Pages

Tuesday, March 19, 2013

DIY Printed Arrow Leggings

I love baby printed leggings but I couldn't justify spending so much on something Jacob wouldn't wear for long so I decided to make my own. Seriously, my chubs is growing out of them already!

Materials:
plain leggings (I got mine from the baby girl section at Wal-Mart. Jacob is 7 months and these were 12 months.
fabric paint
paint brush
image
freezer paper or stencil blank
iron (optional)
xcacto knife

1. Draw your image. I freehanded a simple arrow but you can find and print your image online.

2. Trace your image onto freezer paper and cut around the outline with your xcacto knife. I didn't want to spend extra money so I repeated this for every arrow but if you want a more permanent stencil you could use stencil blanks instead of freezer paper using the same method.

3. If you're using freezer paper, iron on your stencils onto the fabric with the shiny side down and paint over the stencils. If you're using a stencil blank, you can go straight to painting! I needed three coats of paint. I think I'll use a stencil blank next time to save some time!

4. Heat set the fabric paint and follow the instructions on the paint bottle for care instructions. Pair with a solid color top or a cute graphic tee! I can't wait to make more prints! Feathers next?!

Monday, March 4, 2013

No Sew Ribbon Hair Bows

I've been trying to organize my craft supplies and have discovered that I have an endless supply of ribbon so I decided to make some simple hair bows. I don't have a daughter so I'm saving them to gift out later. They make great baby shower presents and takes two minutes to make!

Materials:
ribbon
lighter
scissors
bobby pins
glue gun

1. Cut two pieces of ribbon at 5" and 1".

2. Seal the ends with a lighter to prevent fraying.

3. With the longer piece of ribbon, bring both ends to the center and glue.

4. Put a dot of glue in the center and squeeze down in the middle to form a bow.

5. Wrap the shorter piece of ribbon in the center of the bow.

6. Glue on a bobby pin to the back of the bow.

Saturday, March 2, 2013

Honey Walnut Shrimp Recipe

I practice not eating meat on Fridays during Lent so I decided to try cooking honey walnut shrimp for the first time yesterday. I adapted the recipe from a couple of similar recipes I found on the Internet and made some measurement changes. I totally messed up the first time and I burned my upper arm pretty badly in the process but it was so delicious, it was worth it!

Ingredients:
1 cup of water
2/3 cup of sugar
1/2 cup of walnuts
3 egg whites
2/3 cup of mochiko
1 cup of vegetable oil
1 pound of pre-peeled shrimp
1/2 cup of mayonnaise
2 tablespoons of honey
1 tablespoon of sweetened condensed milk

1. In a saucepan, stir together 1 cup of water and 2/3 cup of sugar. Bring to a boil and add 1/2 cup of walnuts. Boil for two minutes. Drain the water and sugar mixture and set walnuts aside to dry.

2. In a mixing bowl, whip 3 egg whites until it is foamy. Stir in 2/3 cup of mochiko and mix until it forms a paste.

3. In a deep skillet, add 1 cup of vegetable oil. Heat over medium high heat.

4. Cover 1 pound of shrimp in egg white and mochiko mixture and carefully add one by one into pan. Fry until it is golden brown, apprximately 4 minutes.

5. In a separate bowl, add 1/2 cup of mayonnaise, 2 tablespoons of honey, and 1 tablespoon of sweetened condensed milk. Stir.

6. Toss shrimp in sauce and top with walnuts. Enjoy!

Wednesday, February 27, 2013

ban.do Inspired Heart Shoe Clips

I fell in love with ban.do's heart shoe clips but couldn't find it in me to spend $25 on them. Luckily, For Chic Sake posted a tutorial to make similar ones. Mine didn't turn out as nice as theirs (I have a love/hate relationship with my glue gun) but I still love the results despite all of the imperfections. I had all the materials already except the shoe clips which I ordered from eBay (I got 10 pairs for a little over a dollar) so it was a very inexpensive project! You could also glue the heart onto an alligator clip or an elastic band like I did here to make cute hair accessories.

Tuesday, February 26, 2013

No Sew Tutu

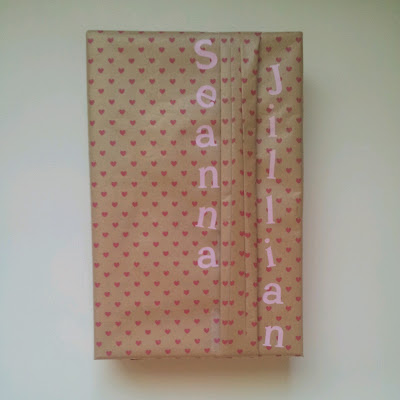
My cousin-in-law had her first baby on February 13th, sweet baby Seanna. To welcome her to the world, I made her a no sew tutu and matching sequin headband (I'll post about that later). I'm not going to post a tutorial here because there are so many out there and it's super easy (Seriously, if you can tie a knot, you can make a tutu) but if you're looking for tulle I used the 6 yard rolls of tulle found in the craft and fabric section at Wal-Mart. For the colors, I used light pink, hot pink, and fushia. Since the tutu was made for a baby, I have plenty of leftover tulle so I decided to do a giveaway. Win a tutu for the little princess in your life through my Instagram.

Friday, February 22, 2013

Lego Ring Tutorial

One of my favorite pieces of jewelry is my Lego ring that my older sister made me. I get compliments every time I wear it. Today I'm sharing a tutorial so you can make your own!

Materials:

Lego 2x2 bricks
adjustable blank rings
rhinestones
adhesive (I acutually used my glue gun because my E6000 was dried up.)

1. Apply glue around the circle underneath the Lego brick and hold ring in place for 10 seconds.

2. Choose a circle and glue on a rhinestone.

That's it, you're done!

Thursday, February 14, 2013

Happy Valentine's Day

Happy Valentine's Day! What are your plans? Today I'm sharing pictures from my sons' Valentine's Day photo shoot. To say it was rocky is an understatement! I don't know how parents gets professional looking photos of their kids. Joshua absolutely hates taking pictures and can be so uncooperative so if you know the secret, please share! This is a taste of how it all went down...

Joshua kept making funny faces...


and taking off his pants while Jacob kept eating his feet and covering his body suit.


Joshua was not cooperating (He's soo anti-Valentine's Day)!


They both kept moving around so the pictures turned out blurry.


I think this was the best shot of the two of them together.


Even though the pictures didn't turn out like what I had in mind, I know I will look back and be glad that I have them. I'm so lucky to have these little men in my life! Have a Happy Valentine's Day!


Wednesday, February 13, 2013

Strawberries & Cream Smoothie

I had a big bag of frozen strawberries that I needed to use so I made a simple strawberries and cream smoothie this morning. It's healthy, refreshing and takes less then five minutes to make!

Ingredients
1 cup of frozen strawberries
1/2 cup half and half cream
2 large spoonfuls of sugar

Blend all of the ingredients together and enjoy your smoothie!

I had some ripe bananas so I made a strawberry banana smoothie as well. The banana flavor is pretty strong so I suggest using only half of the banana if you're using the measurements above!

Tuesday, February 12, 2013

Freezer Paper Stencil Tutorial

I didn't get around to sending out cards last Christmas due to procrastination so I promised myself I would make Valentine cards to hand out instead. I know, it's almost Valentine's Day!

I really wanted to take pictures of my boys in a kissing booth but since the little one is only six months old, I had to think of something else. After scouring Pinterest, I found the perfect solution!

I was inspired by this adorable baby. The boys had some stained white tops that were perfect for this project. I love how they turned out! I can't wait to pucker up and cover my boys in kisses!


Want to make your own freezer paper stencil? I promise you it's super quick and easy! Here's how:


Materials:
freezer paper
template
scissors
item of clothing
iron
fabric paint
piece of cardboard

1. Trace your image on the flat side of the freezer paper.
2. Cut out the inside of your image.
3. Position the freezer paper shiny side down onto your item of clothing and iron it down.
4. Stick a piece of cardboard in between so that the paint doesn't leak.
5. Paint over your stencil and wait for it to dry.
6. Peel off the freezer paper and you're done!

Since I was only going to use the shirts once, I skipped making another stencil and just wrote on it with a black Sharpie permanent marker for the lettering. I can't wait to share the photos with you!

Sunday, February 10, 2013

A New Year, A New Blog

First and foremost, Happy Lunar New Year! I've never been big on making New Year's resolutions, or at least keeping them, but creating a blog to showcase my love for all things do-it-yourself and keeping it updated has always been on top of my list. What are your resolutions? Here are mine:


Without further ado, welcome! I hope you enjoy this blog, find inspiration to create, and leave here with a smile. I can't wait to embark on this new adventure! Here's to a DIY-filled 2013! xox, Donna